about marches mushrooms
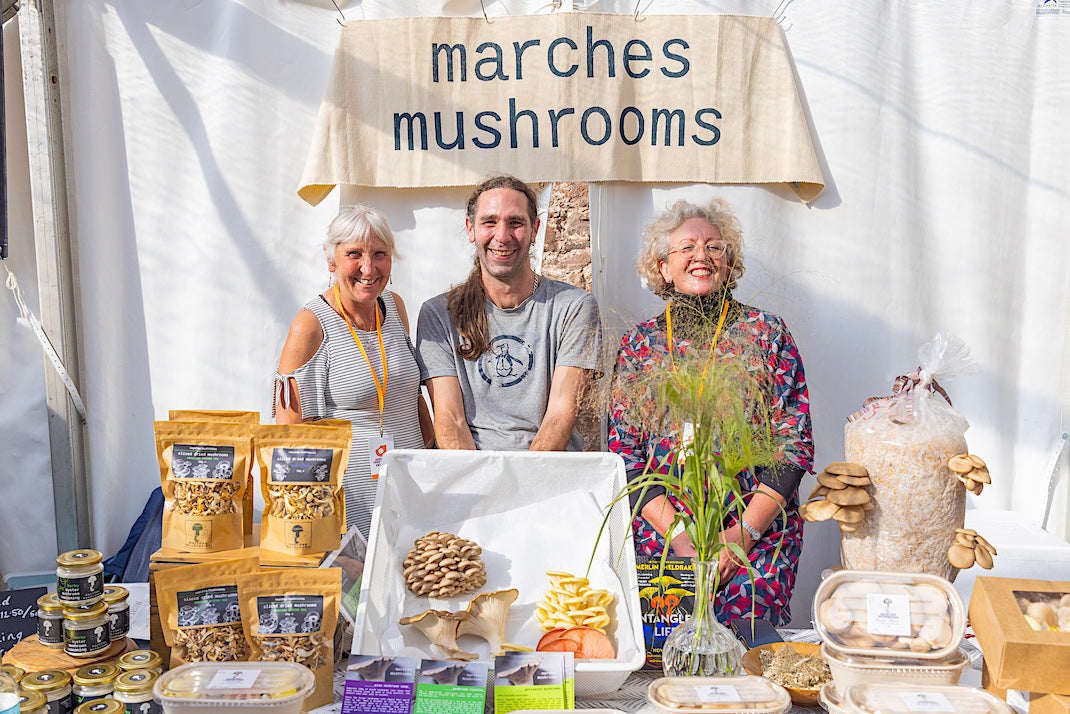
tucked away right on the wales-england border, high up in the lush green hills, sits our tiny farm. we rent part of a disused dairy farm which shut down twelve years ago. now, small business rent out units at the farm. we converted the old bottling rooms and laboratory into our incubation and fruiting rooms, where we grow a variety of wood-loving mushrooms. unlike white button mushrooms and 'chestnut' mushrooms, there's no manure, and no dark caves in our process. rather, our mushrooms need an abundance of fresh air, mist, and light to grow. we control an indoor environment to provide the optimum conditions, and to keep pests away!
we started this journey as a couple during the pandemic, since both our lines of work were affected by what was going on, and we felt a push to provide food locally, as the shops were looking more bare than ever. mushrooms are such a fantastic crop for a whole plethora of reasons. our top three must be their amazing taste, nutrition and health value, and thirdly, the fact that they take so little space, water and energy to produce, especially when compared to almost all other food crops and staples such as cotton, meat, fruit and vegetables...
we pride ourselves on selling the cleanest, freshest mushrooms that money can buy, and producing very little waste, and tons and tons of beautiful compost for gardens.
grey and black pearl oyster mushrooms
how soon must i start my kit?
pre-colonised mushroom grow kits like ours are a live product, and they have a lifespan which will depend on how they are stored. for the best results we always recommend starting your kit as soon as possible, as the block is bursting with energy and life and will want to start growing as soon as it can. if you can't start it right away, keep it in the fridge (2-5oC) for up to three weeks. it might be okay for up to a couple of months in there, but we couldn't guarantee it!
how do i start it?
open the box first, by peeling back the tape by the flap. take out the contents - there is a spray bottle, the colonised block of substrate in a bag, and the instructions sheet... open up the windows at the back of the box (carefully use a craft knife or similar to help you, guided by the perforations), and then put the block back in, with the top of the bag folded down tight to prevent the mushrooms from trying to grow from the top of the block.
shut the box back up using the tape.
with sterile scissors, cut a cross in the plastic, through the window hole, about 10 x 10 cm. this is where you want the mushrooms to grow from.
now, you just have to remember to keep an eye on the block, and spray it with some water from the spray bottle, at least twice a day, but more often if you can. the trick is not to let the substrate dry out whilst you're waiting for the mushrooms to grow - so it's best not to peel back the plastic where you cut an X. just spray directly at it, and around the windows to keep the humidity there.
give the instructions sheet a good read too - if you haven't already!
what are the growing parameters?
oyster mushrooms naturally grow in wooded areas on trees or decaying wood, where there is shaded light, moisture and a fresh breeze.
they are able to cope with a range of conditions, but they have their limits!
the ideal temperature range is between 12 and 20 degrees C. oyster mushrooms can cope with cooler temperatures, down to 6 degrees, but their growth will slow right down. they can also do alright when it's hotter than 20oC, as long as they have enough humidity to keep them from drying out. mushrooms should have a high water content, and can absorb moisture super fast.
a humidity of between 70-85% rH is ideal, however, as long as you mist them regularly with water, they will be happy and continue growing.
think shaded woodland dappled with sunlight, cool, damp air and a fresh breeze! :)
will it be ok in the shed / conservatory / cupboard?
hmm... probably not ideal places for your grow kit. here's why...
an outbuilding or shed will most likely fluctuate in temperature too much, and may also be a bit dark or the air a bit stagnant. mushrooms love daylight (not hot, direct sunlight though), fresh air, and high humidity.
for similar reasons, the conservatory or a greenhouse would likely get too hot in the day and too cold at night. the grow kit would probably dry out very quickly and fail to produce any mushrooms in these environments.
cupboards are too dark for these mushrooms! (it's the white supermarket mushrooms that love to grow in the dark!) oyster mushrooms naturally grow in woodland areas, where there is shaded light, moisture and a fresh breeze.
nothing's happening - what's wrong?
first, make sure the growing parameters are correct - look at the surface of the block and the mycelium under the opening you made in the bag. does it look dry and yellow?
take a peek under the plastic flaps by carefully peeling them back - is it moist underneath? it should be! are there small clusters of tiny 'pins' (baby mushrooms) forming? if so, that's great - and don't worry, they will find their way out of the opening given time.
all mushroom growing blocks are unique, and some will take slightly longer to get going than others. keep spraying the block regularly and inspecting it visually. it may take up to two weeks for the mushrooms to start appearing, but an average amount of time is 10 days from opening.
if you're not sure, please take a photo of the opening of the grow kit and email us - we are here to help!
what is this white fluff - is it mould?
mycelium is the mushroom's root system, and it's soft and fluffy and white (sometimes pale yellow). it can look a little bit like mould until you get used to how it looks and the differences between them.
the fine soft white fuzz that you might see on oyster mushroom stems and cap tops isn't mould, but mycelium. this can be in response to the environment, is totally natural, safe and friendly. it's healthy and safe to eat, and has nothing to do with unwanted organisms :) in fact, given enough time at room temperature, once a mushroom has completed it's life cycle and dropped it spores, it can consume itself with mycelium and start the growing process again.
if you can see green, blue or black patches on the mycelium, that's more likely to be mould. the mushroom's mycelium has a good resistance to pathogens and will fight and contain them, usually. you can leave them be if they are underneath the plastic away from the growing mushrooms, or if it's accessible to you, you can cut away the infected patch with a clean spoon or knife and dispose of it, leaving the rest of the white mycelium behind to continue growing.
if in doubt, give us a shout!
my mushrooms are growing into the cardboard windows!
that's okay - you can either cut the windows off, stick them back to give the mushrooms more room, or you can leave them as they are because the mushrooms will force their way through! mushrooms can double in size every few hours when they're really going for it!
how can i get more vitamin D from my mushrooms?
that's an easy one! just pop your mushrooms outside in the sunlight for 20-60 minutes, on the day that you want to harvest them. the sun's rays will stimulate the mushroom to start hyper vitamin D production. check out this study for more information.
when are they ready to pick?
bigger is not always better with mushrooms. if left for too long, they will drop their spores, leaving the dust of spores underneath them and in the air. that's ok, however, you don't really want them in the air and everywhere, so it's best to pick them a day or two before this, not only to avoid spores, but also because they are firmer and keep for longer if you pick them earlier. the longer you leave them to grow, the more brittle and delicate the caps will become.
the perfect time to pick them is once they are nice and big and deep in colour, while the edges of the caps are still curled downwards slightly (not fully opened and turning upwards).
you're welcome to send us a picture over and we will give our opinion on readiness! just email or whatsapp us a picture of your mushrooms!
how best to harvest these beautiful mushrooms?
when the mushrooms are ready to harvest, you can either use a knife to cut them off the block, as close to the surface as possible.
you can also try gently grabbing the whole cluster with both hands, and pulling and twisting them. they should come away from the block quite easily, leaving a fresh, brown void in the substrate which will eventually re-colonise with mycelium if you care for it well by not letting it dry out.
what's the best way to get a second crop?
your mushroom fruiting block contains enough energy to produce more than one flush of mushrooms. at the right time of year, we have seen up to five flushes from one block.
it's all about keeping the mycelium happy. after cropping your first flush, there are a few ways to go about getting a second and a third.
don't be too disappointed if nothing more grows - the majority of the yield comes in the first flush.
for a second flush, you can tape up the original cross you made, turn the block over and start from a new cross on the fresh side. the mushroom will notice that the air and mist are now coming from the other direction, and should start to grow there as a result.
alternatively, if the site where you harvested the first crop is clean looking (no old stems or yellowing or drying parts), you can just give it a good spray and start waiting patiently for it to recolonise the area and sprout again, making sure to keep on top of daily misting so it doesn't dry out.
anther approach, especially for later flushes, is to soak the whole block in cold water overnight, then drain it and start again - either from the same side, or a new side. the block will absorb some of the water to replace what has already been extracted by the mushrooms.
king oyster mushrooms
how do i start my king oyster mushroom kit?
open the box by peeling the tape back by the flap, and take out the contents. there will be a spray bottle to fill up with water, a block of substrate in a bag, fully colonised with mycelium (the mushroom's root system), a humidity bag, and a sheet of instructions. give the instructions a good read as they're full of tips and pointers.
cut one corner off the top of the mushroom block's bag to make a two inch opening through which you can mist the block.
stand the block up the in box (or out of the box on a plate if you prefer), mist the top with water and pop the humidity bag upside-down over the top of the whole thing to keep in the humidity. lift this bag off at least twice a day to mist the block through the opening, and cover it back up. doing this will also introduce fresh air into the bag, which the mushrooms love.
there are water droplets on the surface. what should i do?
some water droplets sitting on the surface of the block or amongst the pins is fine, but if there are lots and lots of beads of water, take the block and gently shake it upside-down over the sink to get rid of some of them.
you might want to put something underneath one end of the block so that it's sitting at an angle which will allow the droplets to roll off.
don't worry too much about the water droplets (at least they provide some humidity), and continue misting the surface of the block twice a day. they shouldn't harm the growing mushrooms in any way at all.
as always, if you're unsure, send us a photo and we can advise you.
why not just cut a cross in the bag, like with the other kits?
well, you could, and the mushrooms could grow just fine, however, king oyster mushrooms are a "top-fruiting" variety, and tend to do much better growing upwards rather than side-ways like the grey oyster, which you'd usually find clinging to the side of a tree/tree stump in the wild.
sometimes the mushrooms can get confused about where the fresh air is coming from, and try to grow underneath the plastic, squishing themselves unless you cut another hole for them to grow through.
some of the mushrooms are not growing...
that's totally normal - they will put out lots of baby mushrooms, and then divert their energy into just growing the ones that had a better start, or live in the best micro-climate for success. sometimes this is near the edge of the surface, and you may have to cut back the plastic bag to allow them more room to grow here, whilst not disturbing the humidity level too much, if you can help it.
if all the small mushrooms succeed and none abort, you're likely to end up with a greater number of smaller mushrooms :)
cut any failed mushrooms off when you harvest the bigger ones, so that the block has a clean surface free of aborted mushrooms, giving it the best chance of success for a second crop.
when is the best time to harvest them?
the best and juiciest bit of the king oyster mushroom is the stem. hopefully the stems will grow nice and fat, and the caps will be small.
the edges of the caps will unfurl as the mushroom reaches maturity. when the edges curl upwards they are getting ready to drop spores. they are best harvested just before this happens, whilst the cap edges are still facing downwards slightly with more room to unfurl further. when picked at this stage before they spore, they can stay fresh for weeks in the fridge.
what are the growing parameters?
king oysters have the same views as grey/black pearl oysters, so check out "what are the growing parameters" question in the above section.
just like a lot of mushrooms, they enjoy fresh air, plenty of humidity, and a normal cycle of daylight and darkness. what they cannot stand is a hot, dry environment, or one with no air flow at all... think shaded woodland dappled with sunlight, cool, damp air and a fresh breeze! :)
how do i achieve more than one crop?
with a little bit of luck, and proper care of your block, you should be able to achieve further flushes. there may be some waiting time in between crops as the block rests and recuperates.
a second flush can be achieved in a couple of ways, as long as the block doesn't dry out too much.
if it's looking or feeling a little bit dry, the best thing to do is soak the whole block/bag overnight in cold water, then drain it and let it start again, keeping up with regular misting.
don't be too disappointed if nothing more grows - the majority of the yield comes in the first flush.
it may fruit again without an overnight soak, if you make sure to keep the humidity up and mist it at least twice a day.
they can rest for up to two weeks before they put out another set of pins.
growing lion's mane mushroom
do i need to start my lion's mane kit right now?
the sooner the better! (see "how soon should i start my kit", above.)
the colonised block of lion's mane in your kit is ready and raring to go, so if you can start it right away then that's perfect.
if you can't do that, pop it into the fridge for up to two weeks. it could still grow fine after much longer than that, but we couldn't guarantee it.
when it comes out of the fridge, it may be a little 'sleepy' until it warms up to room temperature, so give it an extra few days to catch up before you will see anything starting to grow once you've started the process.
how do i start my kit?
open the box first, by peeling back the tape by the flap. take out the contents - there is a spray bottle, the colonised block of substrate in a bag, a humidity bag and the instructions sheet... open up the windows at the back of the box (carefully use a craft knife or similar to help you, guided by the perforations), and then put the block back in, with the top of the bag folded down tight to prevent the mushrooms from trying to grow from the top of the block.
shut the box back up using the tape.
with sterile scissors, cut a cross in the plastic, through the window hole, about 8 x 8 cm. this is where you want the mushrooms to grow from.
now, you just have to remember to keep an eye on the block, and spray it with some water from the spray bottle, at least twice a day, but more often if you can.
the trick is not to let the substrate dry out whilst you're waiting for the mushrooms to grow - so it's best not to peel back the plastic where you cut an X. just spray directly at it, and around the windows to keep the humidity there.
give the instructions sheet a good read too - if you haven't already!
how do i know if it's working?
you probably won't see anything noticeable for at least a few days. after several days though, with regular spraying and care, you will start to see one or more white, foamy looking growths appearing near the cross you made. keep spraying and patiently waiting for it to grow bigger and bigger.
if you don't see any white growths by the tenth day, please email us a photo of the block, including a close up of the opening so that we can advise.
is it supposed to be pink?
a pink tone is a healthy colour for a young lion's mane fruiting body to be, and can indicate strong growth potential. it also indicates that the mushroom is probably not too dry, and if the pink colour doesn't get lighter and lighter over the days to come, it may mean that it's slightly too humid under the bag. in this case, just lift the bag off and let it breath for an hour before replacing the bag back over it. make sure the plastic doesn't sit touching the mushroom.
is it supposed to be yellow?
if the fruiting body is turning yellow, it indicates drying out. once yellowed, the fruiting body is unlikely to recover. it could be that there is too much heat, direct sunlight, or too much air movement, causing 'wind burn'. make sure not to place your kit in direct sunlight, or near a heat source like a radiator. sun rooms and conservatories are just too hot, or fluctuate too much to produce good outcomes with mushrooms.
it's normal to see yellowing / drying mycelium and fruiting bodies alongside white, healthy-looking ones. the mushroom block will often put out more starters than it needs, and then divert it's energy to the ones that are succeeding the most, letting the ones that aren't going to make it dry out.
another reason your lion's mane mushroom could be yellowing is because it's ready to harvest. if the 'teeth' of the mushroom are about 1cm long, it could have reached maturity. if in doubt, shoot us a picture and we can advise you on whether it's ready to harvest.
how do i achieve a second crop?
the first flush, if it goes well, always yields the most. any further flushes you can achieve will be smaller, as the fruiting block starts to run out of energy / moisture.
the best way to achieve a second flush is to tape up the original cross so that air can't get in, and then turn the block over and start a new cross on the fresh side. there's no need to soak it in water at this point, because the bag should have retained most of the block's water content, but if it looks very dry, or you're going for a third flush, give it a soak overnight and drain it before starting again.
don't be too disappointed if nothing more grows - the majority of the yield comes in the first flush.
it may be that the block needs to rest for a week or two in between flushes, so some patience is required alongside religious care-giving!